Layers
Layer Overview
Layers allow you to customize the render loop of your application. You can use layers to implement some advanced rendering features. For example:
- Modify the order in which meshes are rendered
- Set up cameras to render only some meshes
- Set which lights affect which meshes
OasisW applications are always created with a default set of layers that exist. You can create your own layers and reorder them to suit your specific requirements.
By default, a layer is a list of meshes to render. Each layer is split into two sub-layers: Opaque and Transparent. When a mesh is added to a layer, the layer stores it in one of the two sub-layers depending on whether the mesh's material should be rendered transparently. This is because transparent sub-layers are often sorted differently from opaque sub-layers.
Rendering Order
There are three factors that determine the order in which meshes are rendered.
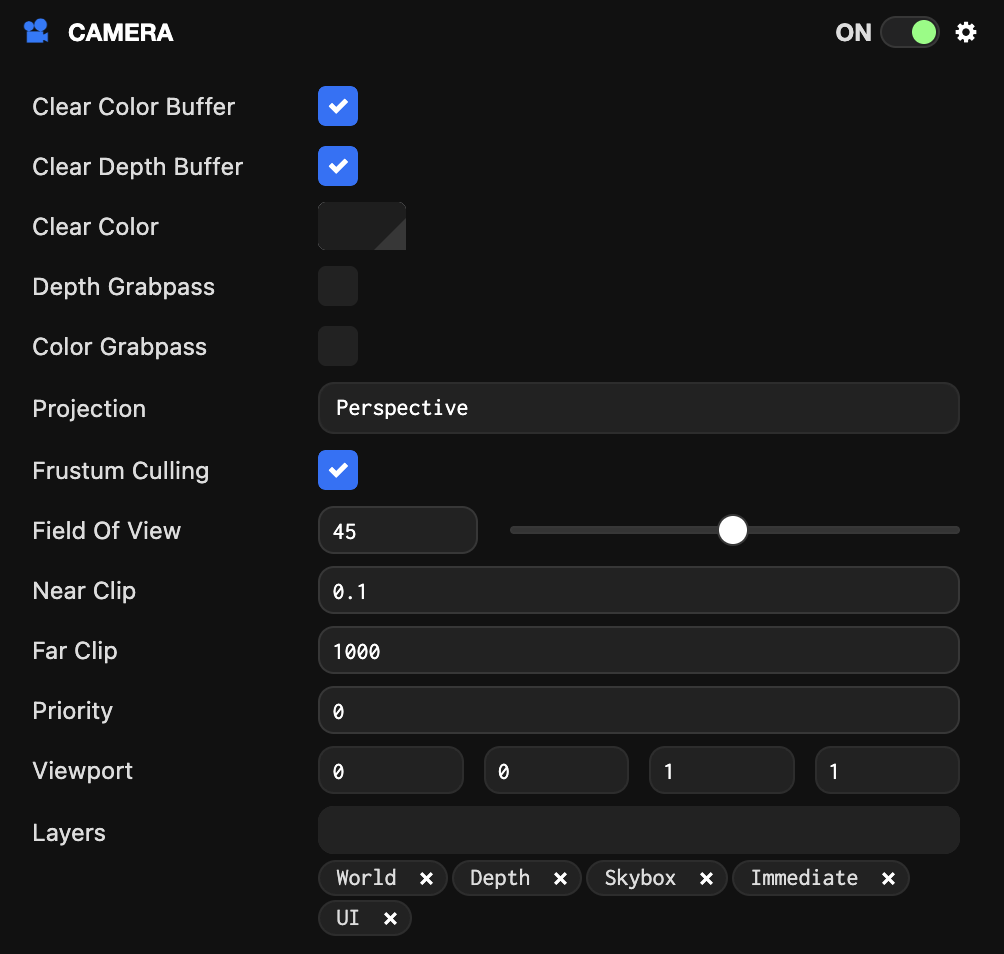
Camera Priority
Camera priority is the main factor that controls the order in which meshes are rendered. Each camera has a priority assigned to it, and cameras with smaller priority values are rendered first.
Each camera also has a list of layers set on it, which controls which layers the camera renders. The order of these is described in the next section.
Layer Composition
Below is the layer order for the application. Each application contains a pc.LayerComposition object accessible via this.app.scene.layers that contains all the layers available to the application. The layer composition determines the order of all sub-layers. The order is based on sub-layers, not layers, so for example, you can render all opaque sub-layers first, then all transparent sub-layers.
Note: Placing a model component inside a layer that renders after the world layer does not mean the model will render on top of everything in the world layer! The standard material used to render models has a property called depthTest. When this is true (the default), before each pixel of the model is rendered, the GPU tests if there is something in front of this pixel. Even if that pixel was drawn in a previous layer, the depth test ensures that only visible pixels are drawn. To ignore the distance from the camera when rendering meshes, disable depthTest on the material.
Sort Modes
Each sub-layer has a sort mode. Every frame, the meshes in the sub-layer are sorted according to that sort mode. This determines the order in which meshes are rendered when the sub-layer is rendered.
- Material / Mesh (
pc.SORTMODE_MATERIALMESH) - This is the default mode for opaque sub-layers. Mesh instances are sorted to minimize transitions between materials and meshes to improve rendering performance. - Back to Front (
pc.SORTMODE_BACK2FRONT) - This is the default mode for transparent sub-layers. Mesh instances are sorted from back to front. This is the correct way to render many semi-transparent objects at different depths, where one blends over another. - Front to Back (
pc.SORTMODE_FRONT2BACK) - Mesh instances are sorted from front to back. Depending on the GPU and scene, this option can provide better performance thanpc.SORTMODE_MATERIALMESHdue to overdraw reduction. - Manual (
pc.SORTMODE_MANUAL) - This is the default mode for UI or 2D layers. Mesh instances are sorted based on theMeshInstance.drawOrderproperty. Element components and Sprite components should be placed in layers that use this sort mode. - None (
pc.SORTMODE_NONE) - No sorting is applied. Mesh instances are rendered in the same order they were added to the layer.
In addition to these sort modes, the MeshInstance.drawBucket property provides an additional, coarser level of sorting for MeshInstances within a layer. This integer value from 0 to 255 (default 127) acts as the primary sort key for mesh rendering. Meshes are sorted in ascending order by drawBucket (lower values render first), then further sorted within each bucket according to the layer's selected sort mode. The drawBucket setting is only effective when mesh instances are added to sub-layers with sort modes set to pc.SORTMODE_BACK2FRONT, pc.SORTMODE_FRONT2BACK, or pc.SORTMODE_MATERIALMESH. This allows you to force specific groups to render before or after other groups regardless of material or depth, providing fine-grained control over the overall rendering order within that specific sort mode.
Default Layers
OasisW applications are created with a default set of layers. You should leave these layers as they are, as some engine features may not work properly without them. The default order is as follows:
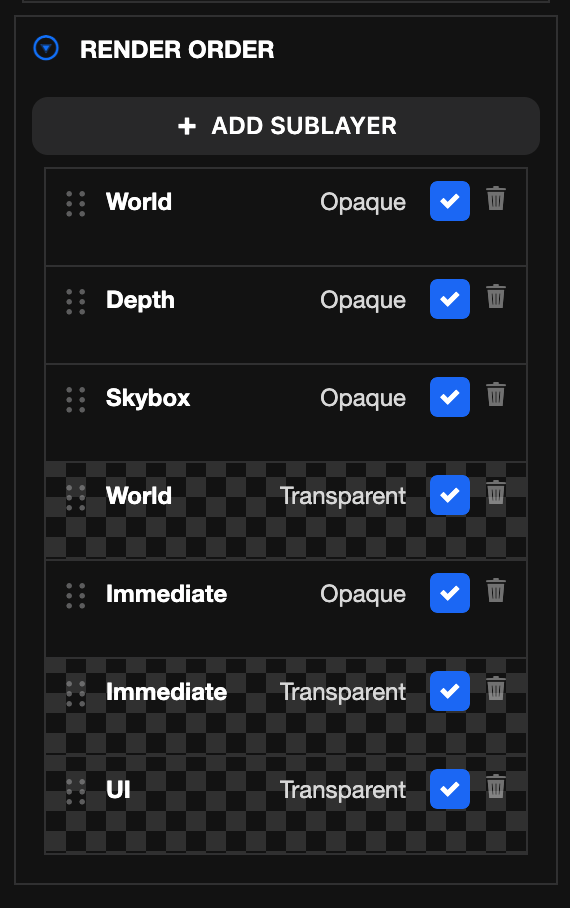
- World (Opaque) - Used to render non-transparent components and most opaque component meshes.
- Depth (Opaque) - Used to capture the scene's color or depth buffer. See Depth Layer.
- Skybox (Opaque) - Used to render the skybox. Rendered after World (Opaque) to reduce overdraw.
- World (Transparent) - Used to render transparent components and other transparent component meshes.
- Immediate (Opaque) - Used to render immediate mode meshes. E.g.
app.renderLine(). - Immediate (Transparent) - Used to render immediate mode meshes. E.g.
app.renderLine(). - UI (Transparent) - Used to render Element components. All Element components are transparent, so the Opaque sub-layer is not used.
Using Custom Layers
Default layers are great for implementing existing engine features, but the real power comes from creating your own layers to customize the order in which content is rendered.
Create a Layer
Layers are controlled in the LAYERS panel in the Settings section of the editor.
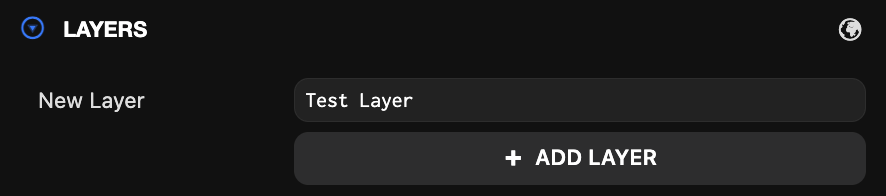
In the layers section, enter the name of the layer you want to create and click Add Layer. The new layer will appear in the list of available layers below the button.
Setting the Sort Mode
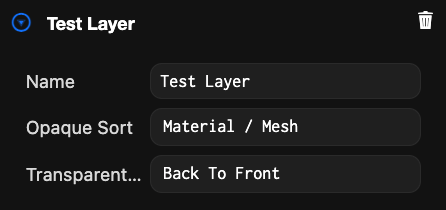
You can select the sort mode for each sub-layer from the layer list. Expand the layer and select the sort mode from the dropdown menu.
Choosing the Layer Order

Add sub-layers to the layer composition by selecting ADD SUBLAYER and choosing which sub-layer to add. Once a layer is in the render order list, you can drag each sub-layer up and down to reorder them.
Rendering Entities in Layers
All components that render meshes have a layers property that is used to determine which layer and sub-layer the mesh should be added to. These components include Model, Element, Sprite, and Particle System. Camera and Light components also have a layers property that determines which layers they render and illuminate respectively.
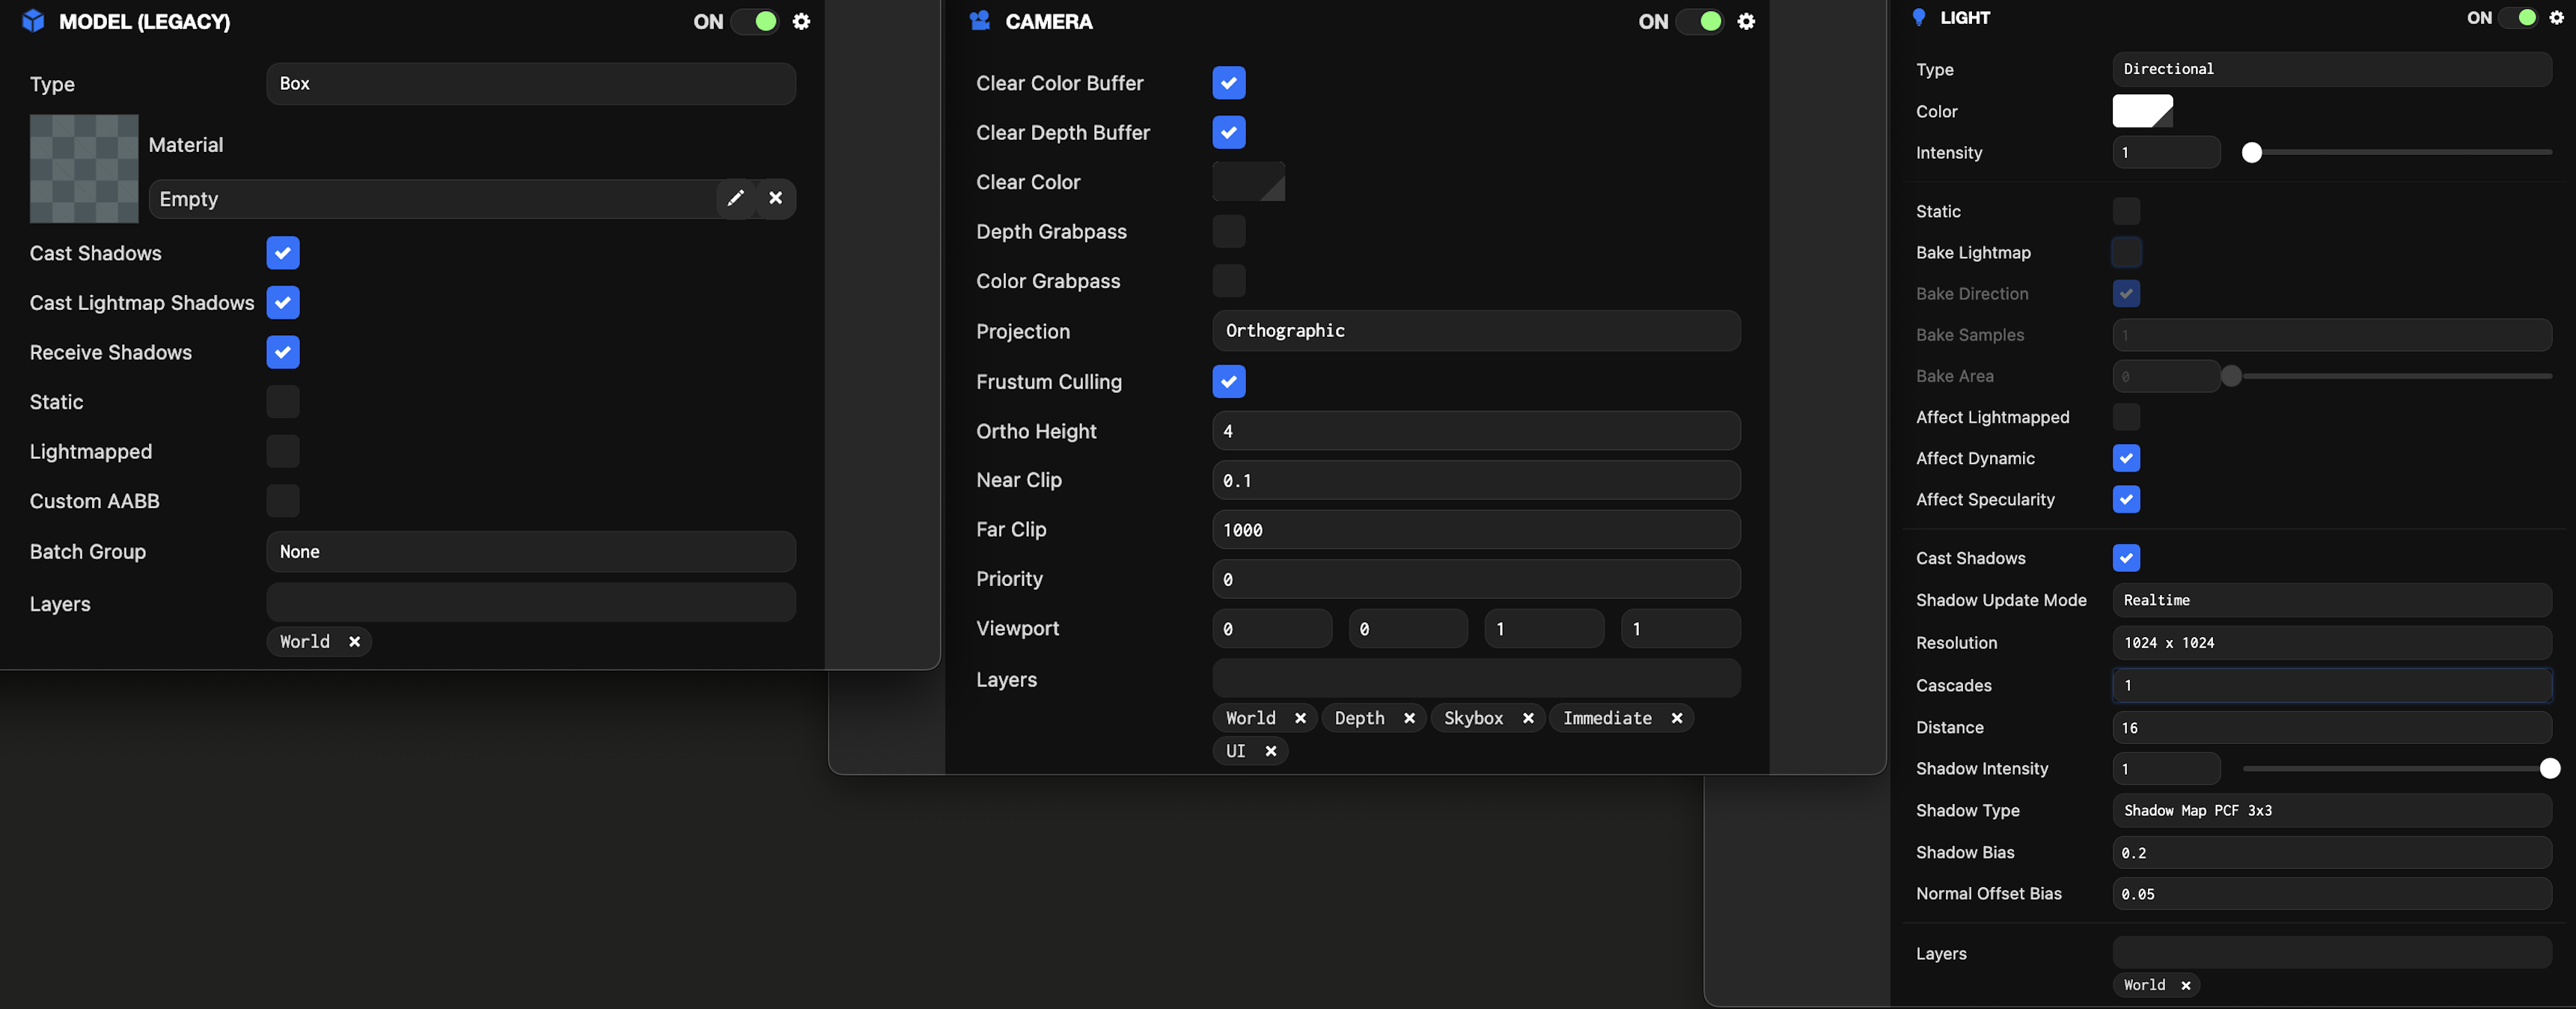
Note: The model has been assigned to the Test Layer. For it to render, the camera must include the Test Layer in its layer list. For it to receive lighting, the light must also include the Test Layer in its layer list.
Recommended Setup
Scenes typically contain many entities that render meshes. It is recommended that each one be in exactly one layer. In most cases, these are in the World layer, but for more control, you can assign them to layers like Terrain, Buildings, Characters, etc.
New scenes contain a single camera by default, which is all that many applications need. Additional cameras are useful for transitions between different cameras in the scene, PIP (Picture in Picture) or split-screen rendering, or rendering the scene to a texture.
When adding additional cameras, we recommend the following steps:
- Set the priority of the new camera and existing cameras to control the rendering order.
- Set the layers of the newly created camera to specify which layers it renders. For example, you might render a top-down map camera and include only the Terrain and Building layers, but not Characters.
- If the camera renders to a texture, use a script to assign a render target to the camera's
renderTargetproperty.