Using Texture Packers
What is Texture Packing?
You often see sprites or UI images bundled together as separate images. Texture packing is the process of combining these separate images into a single texture atlas.
There are several advantages:
- Faster loading times due to a single network request instead of many
- Sprites can be batched in a single draw call since it's a single texture
Tools
There are texture packing tools compatible with OasisW.
TexturePacker Online (Free)
(Website)
A free browser tool that can perform the basics of texture packing.
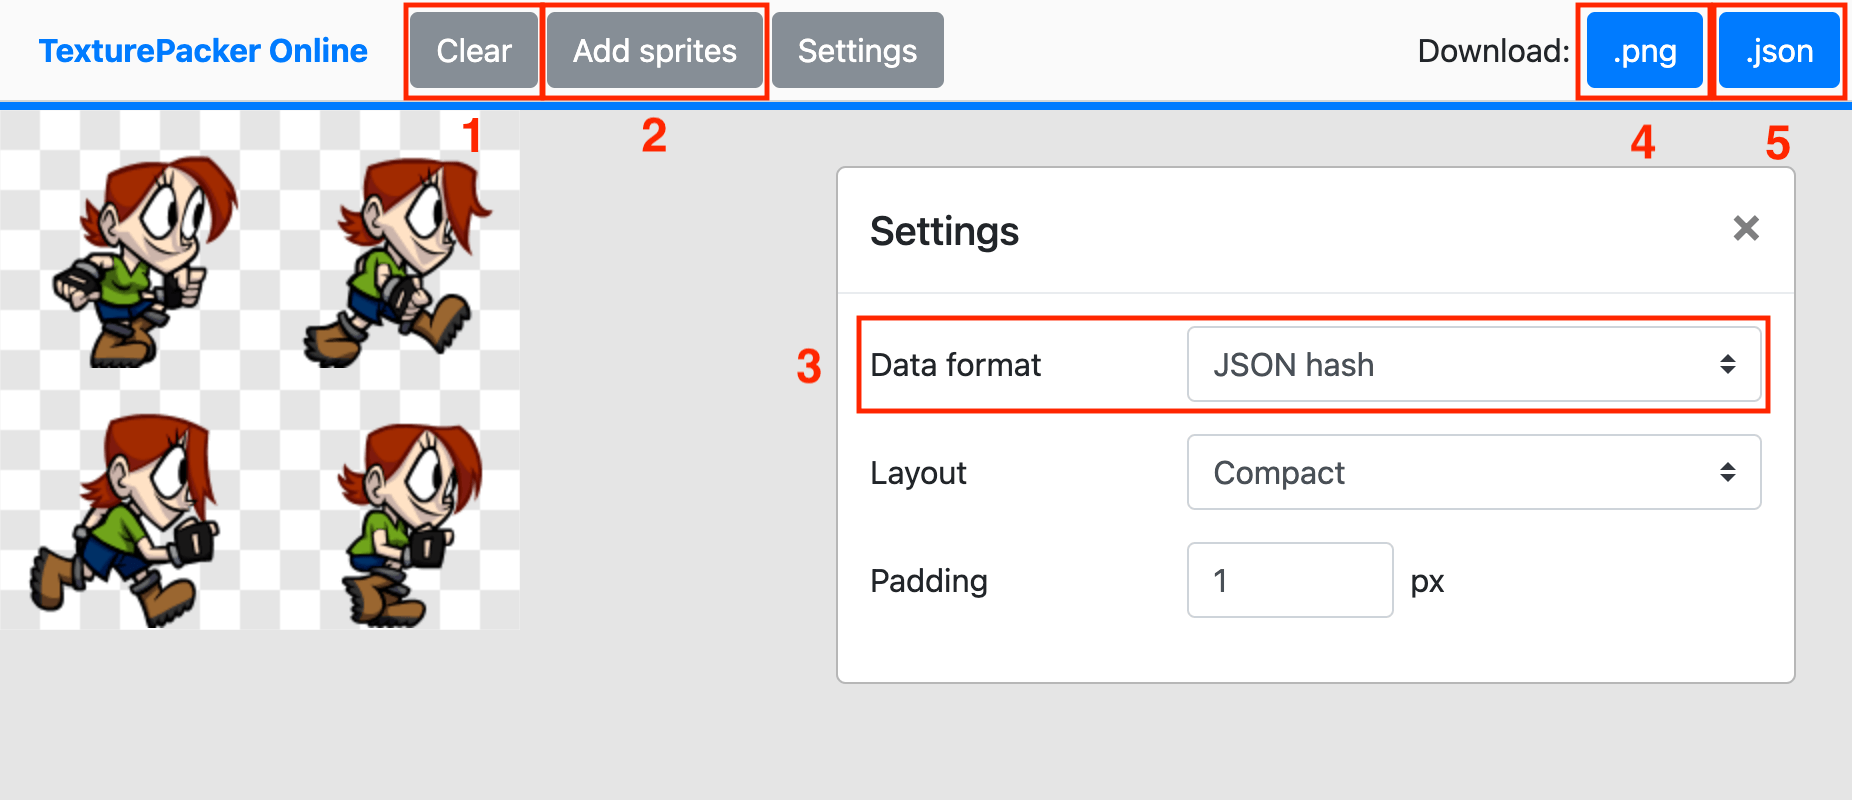
- Clear the texture atlas.
- Add sprite/UI images.
- Keep the data format as JSON hash.
- Download the .png for the texture atlas.
- Download the .json for the frame data.
Texture Packer Tool
(Website)
TexturePacker is a paid tool for download that has more features and options for creating texture atlases. This includes more control over the layout of sprite/UI images and 9-slicing setup functionality.
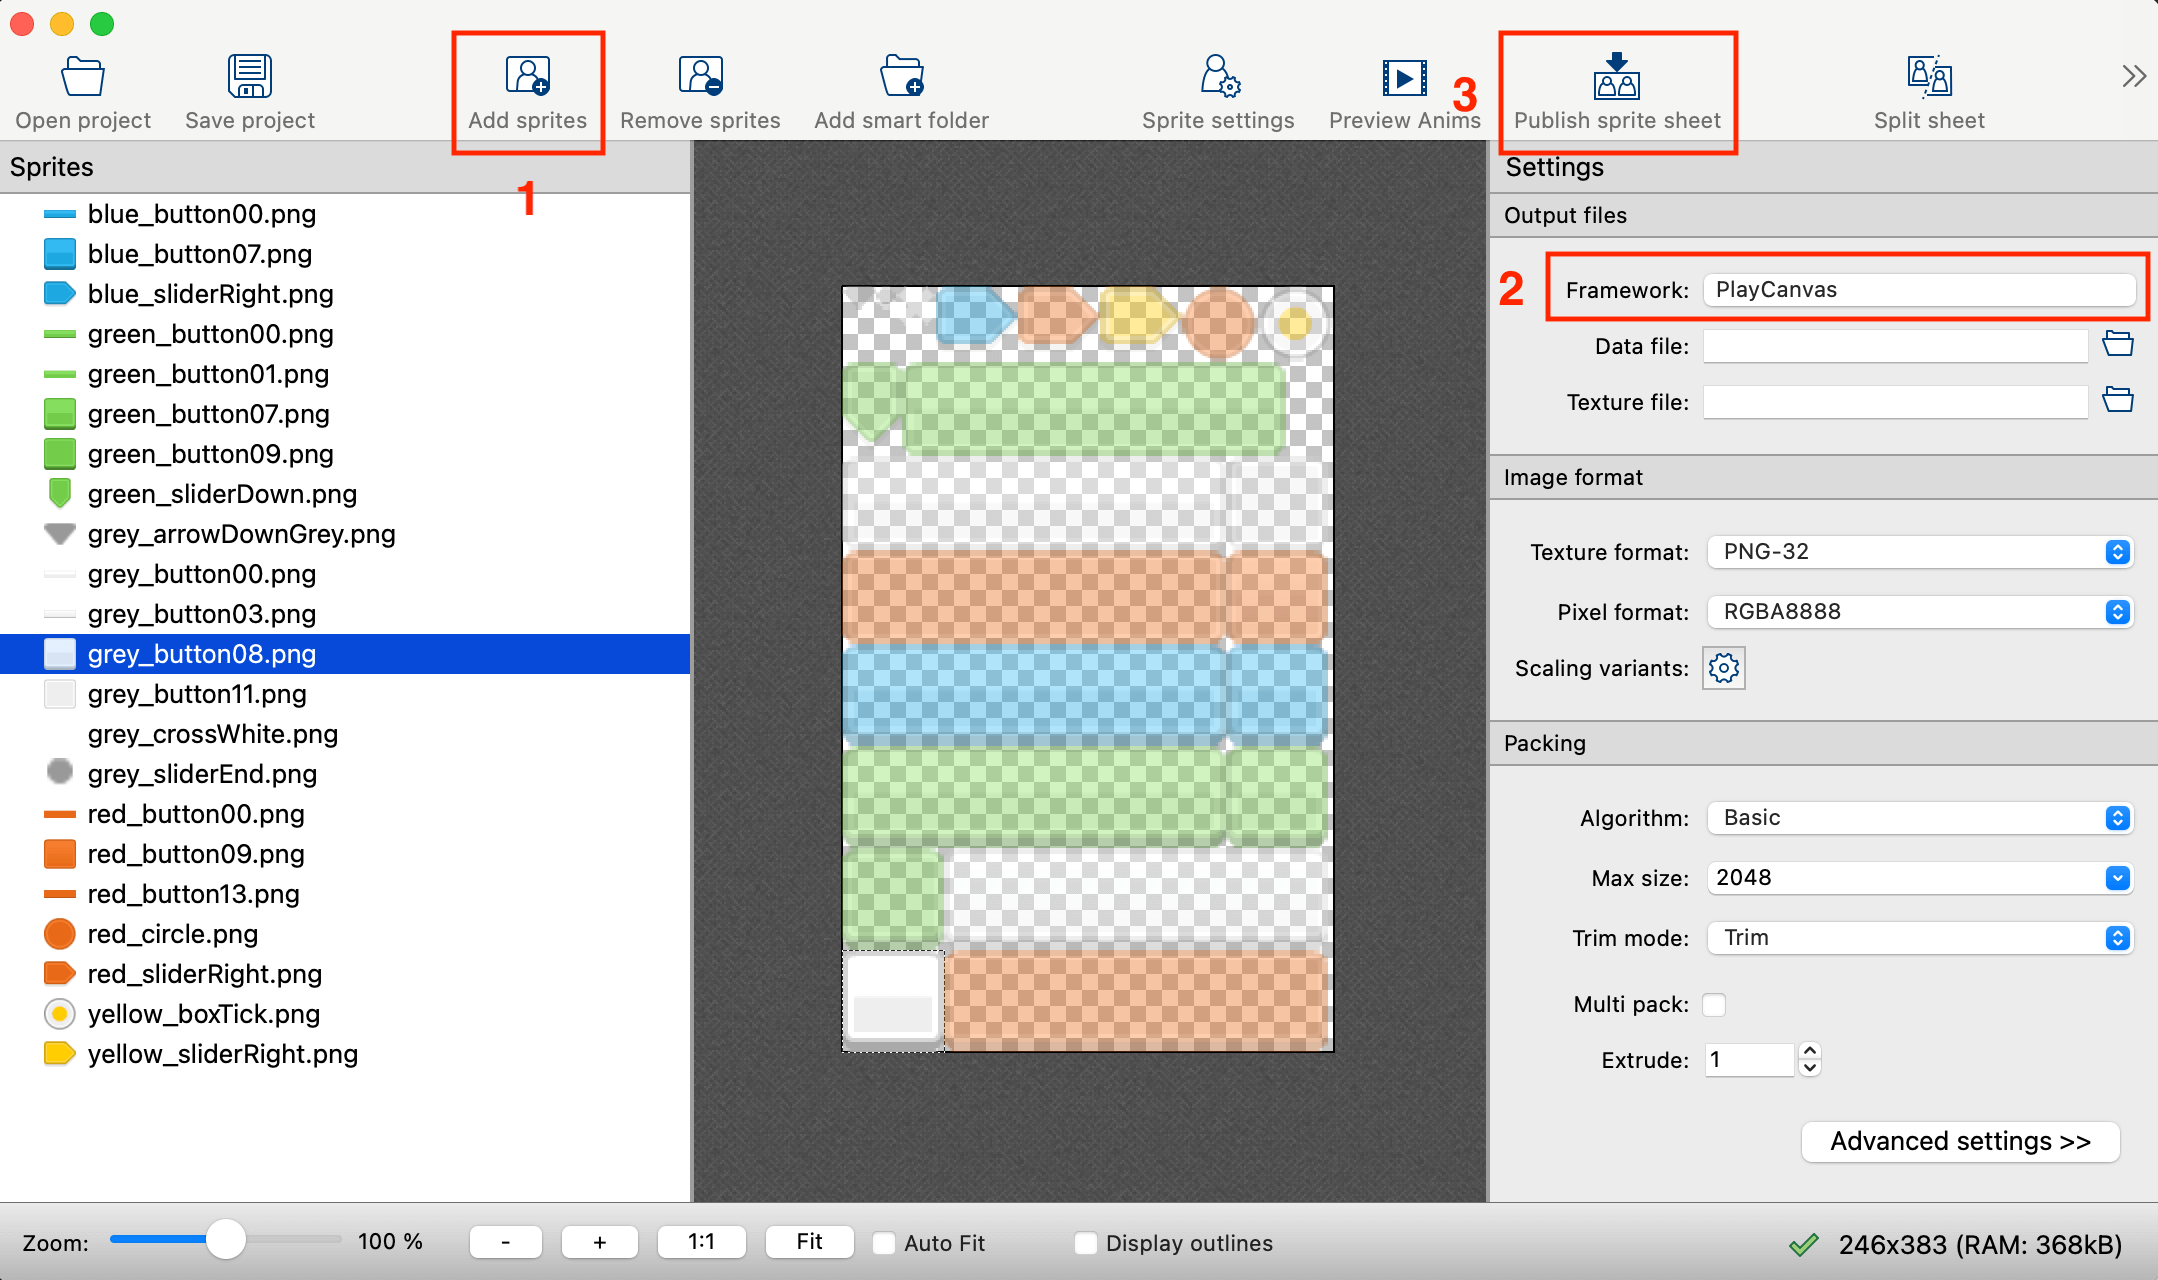
Basic steps:
- Add sprite/UI images.
- Set Output files -> Framework to OasisW.
- Click Publish sprite sheet to create the texture atlas and JSON frame data.
Creating Frames in the Sprite Editor
After uploading the texture atlas file to the editor and creating a texture atlas asset, open the sprite editor.
![]()
Click 'Upload Texture Packer JSON' and select the JSON frame data file to upload.
This will create frames in the texture atlas that can be used to create sprite assets.
When updating the texture atlas later during development, as long as the sprite filenames and frame names remain the same, when uploading new frame data the following happens:
- Sprites removed from the atlas have their frames removed.
- Sprites added to the atlas have new frames added at the end of the list.
- Existing sprites have their frames updated.