Organization Settings
Learn about OasisW Studio organization settings functionality.
Access Method
- Click Organization Settings at the top left of OasisW Studio after logging in.
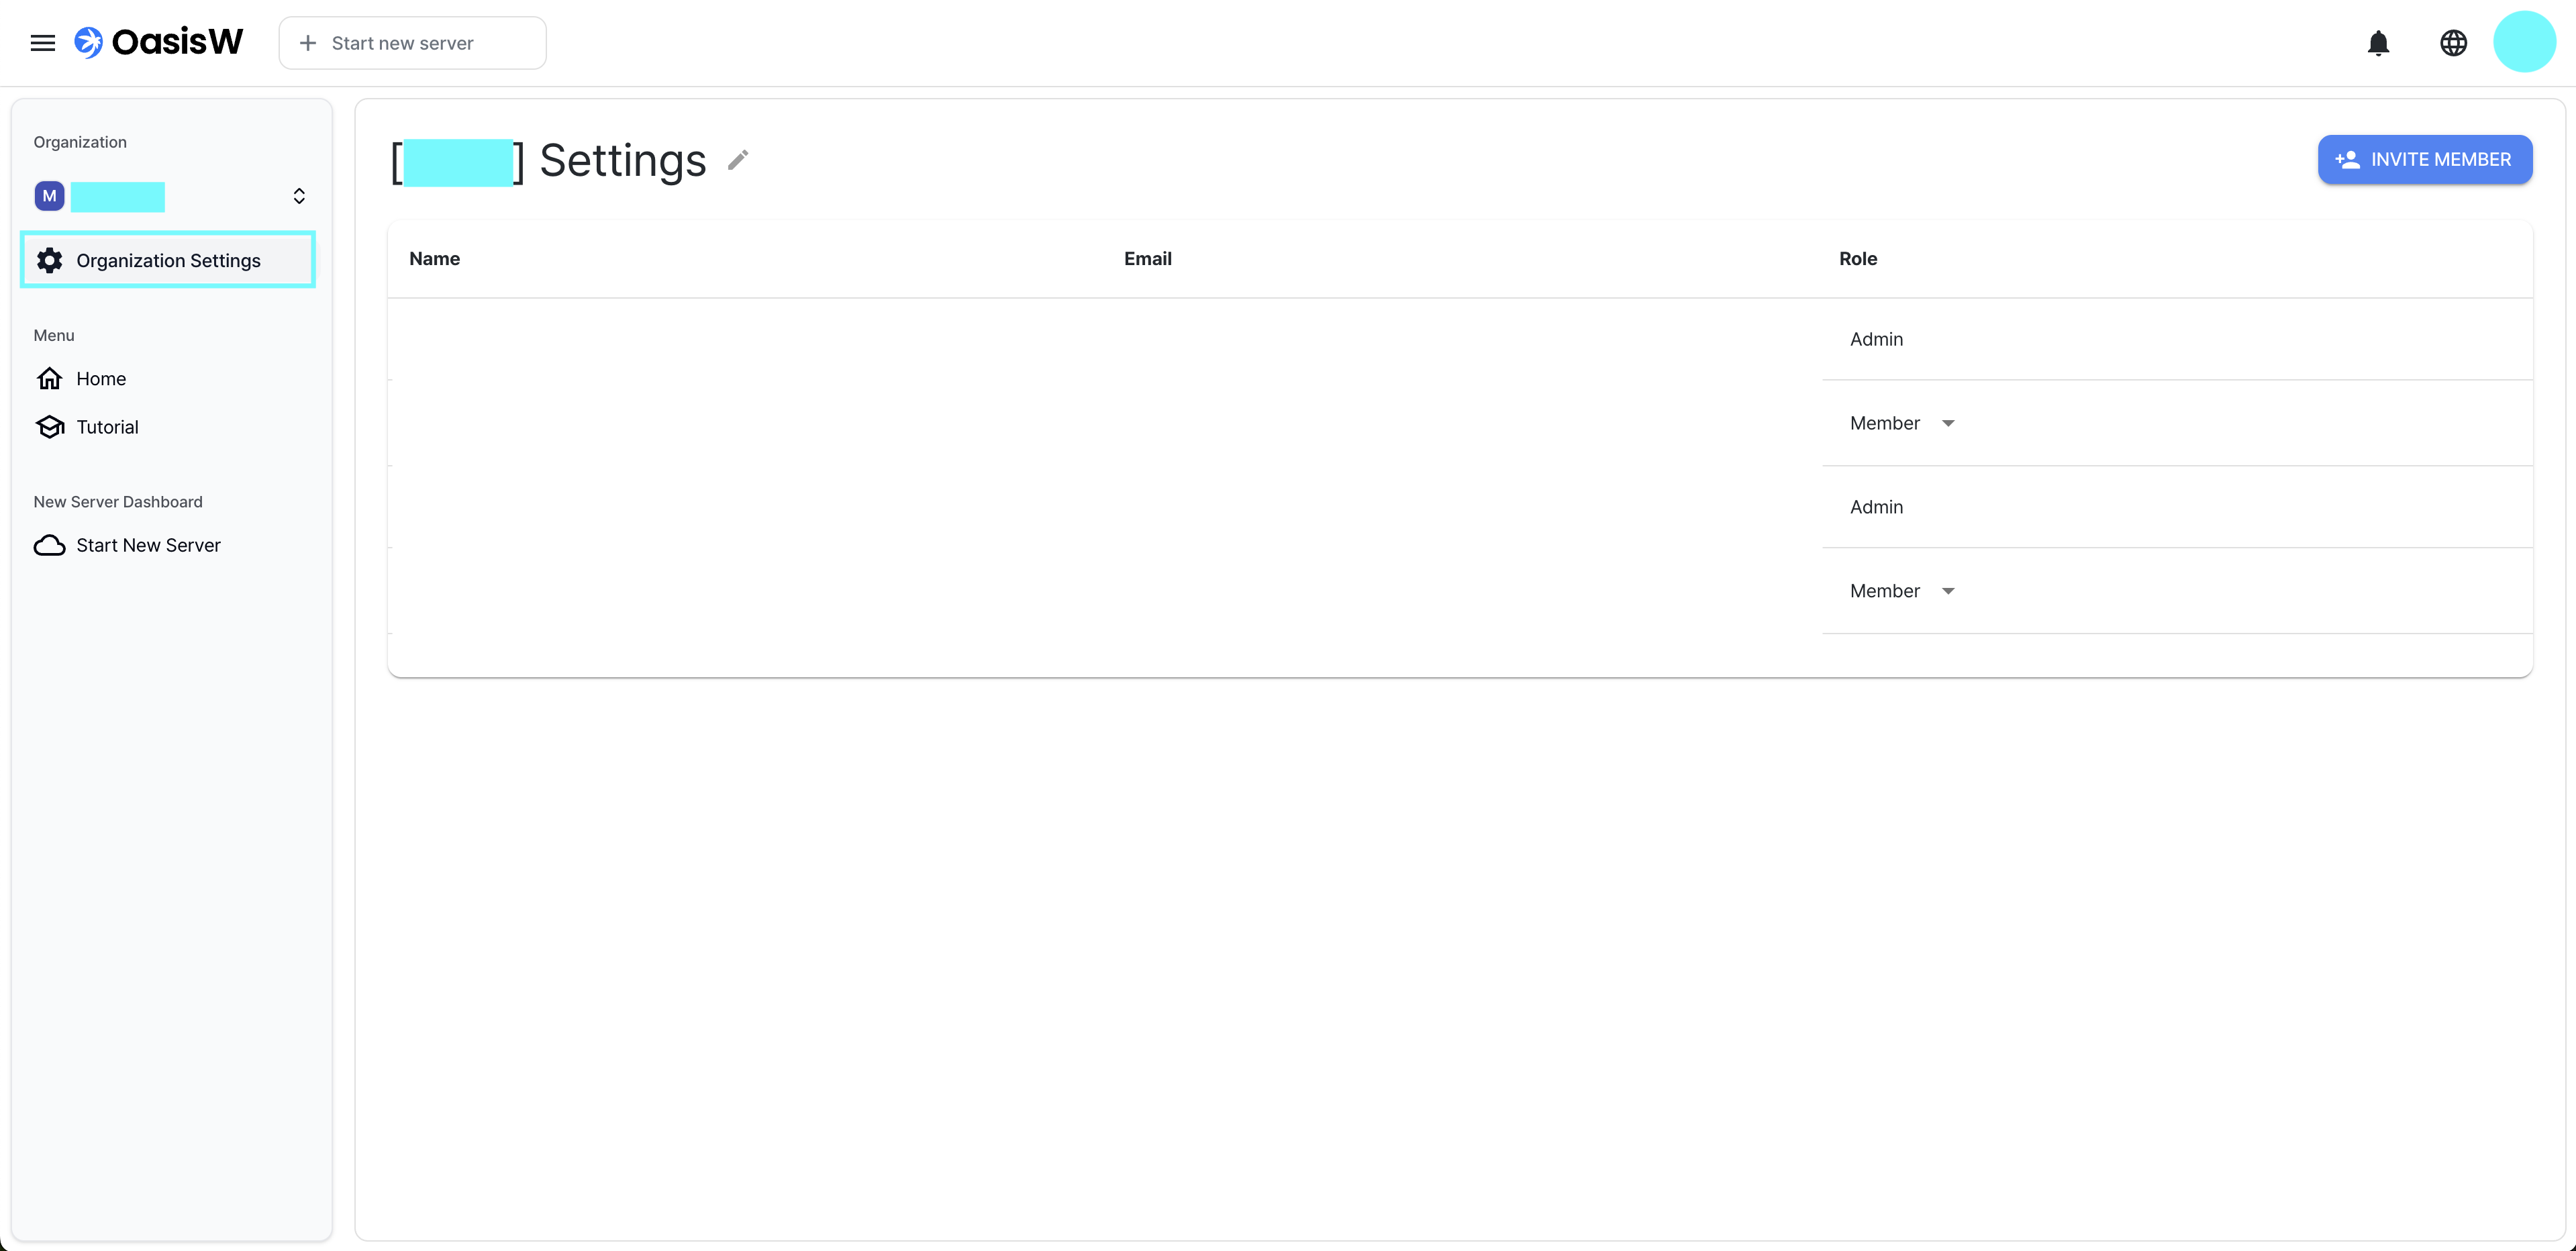
Detailed Organization Settings Description
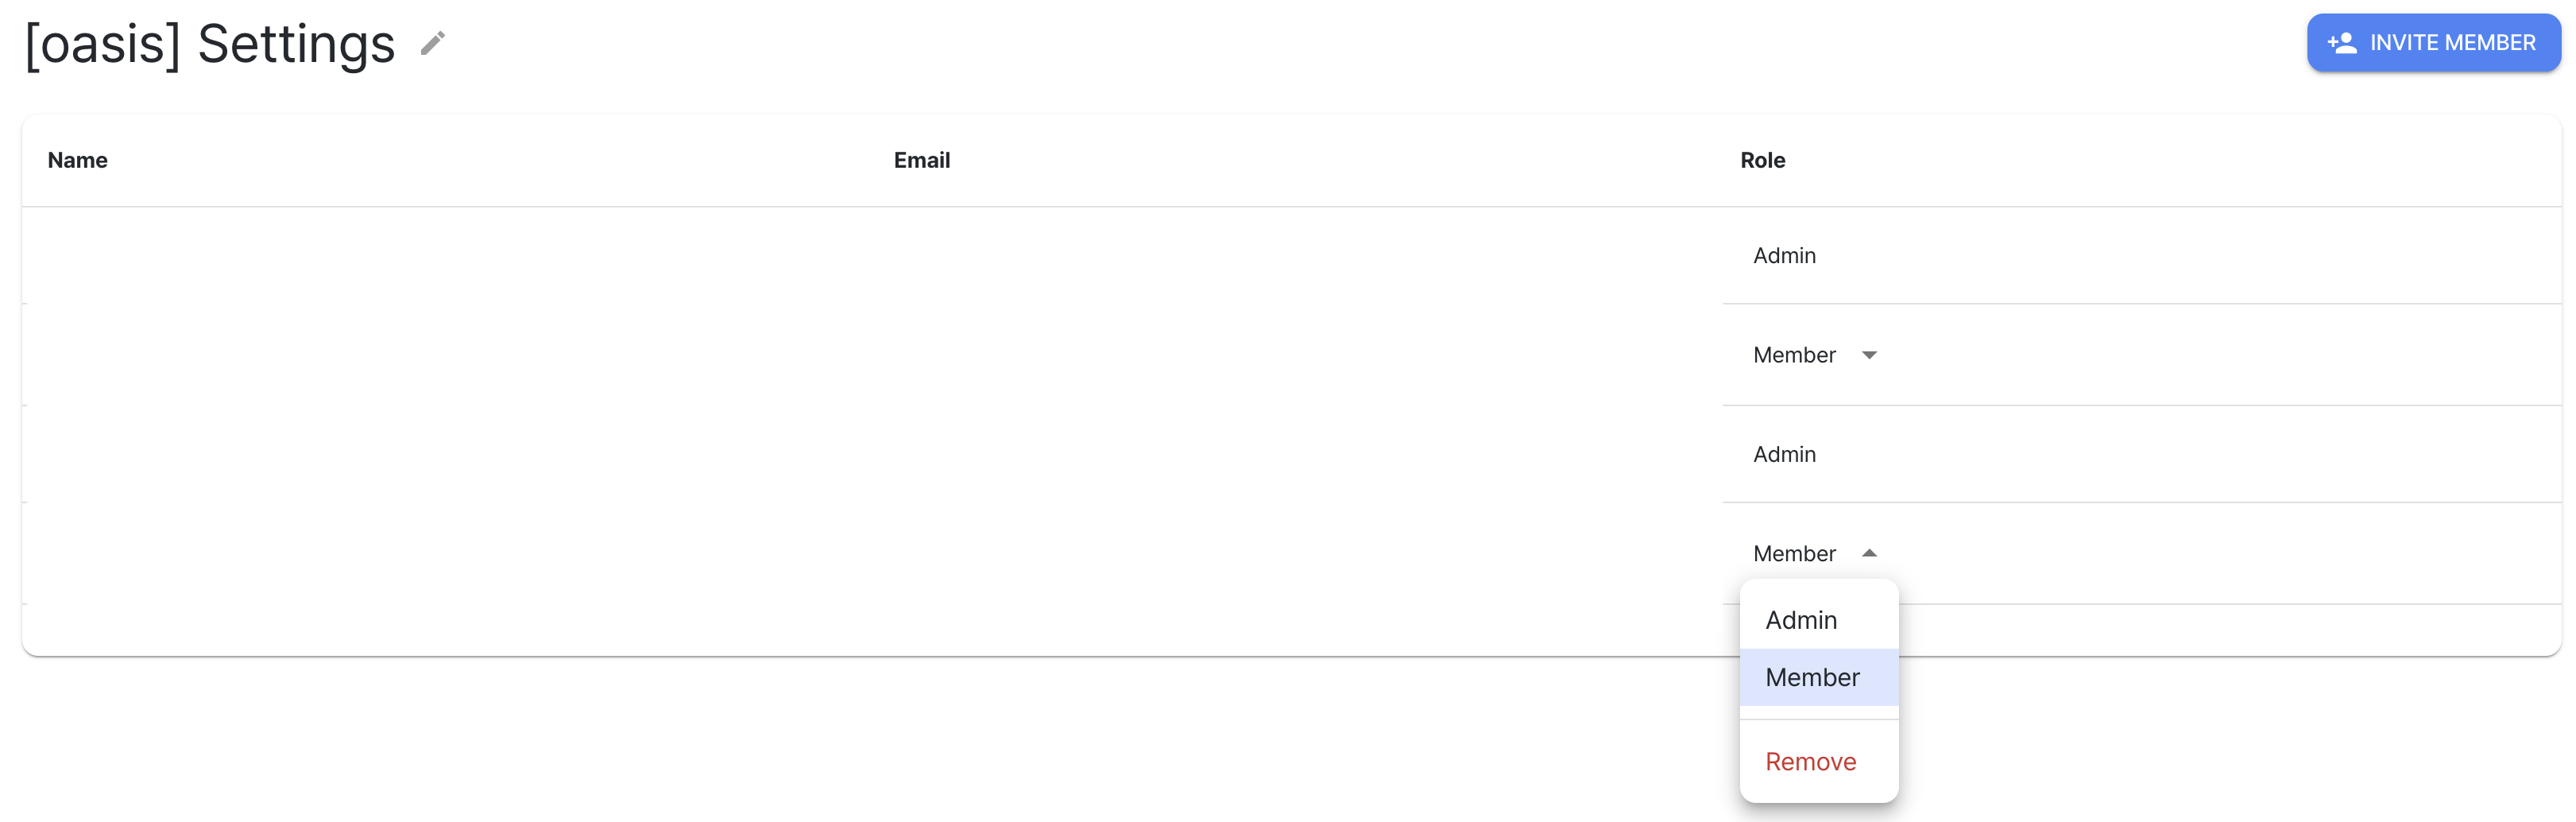
1. Check Basic Information
- You can check your name, email, and permissions (member/administrator).
2. Change Organization Name
- Click the edit icon next to organization settings to change the organization name.


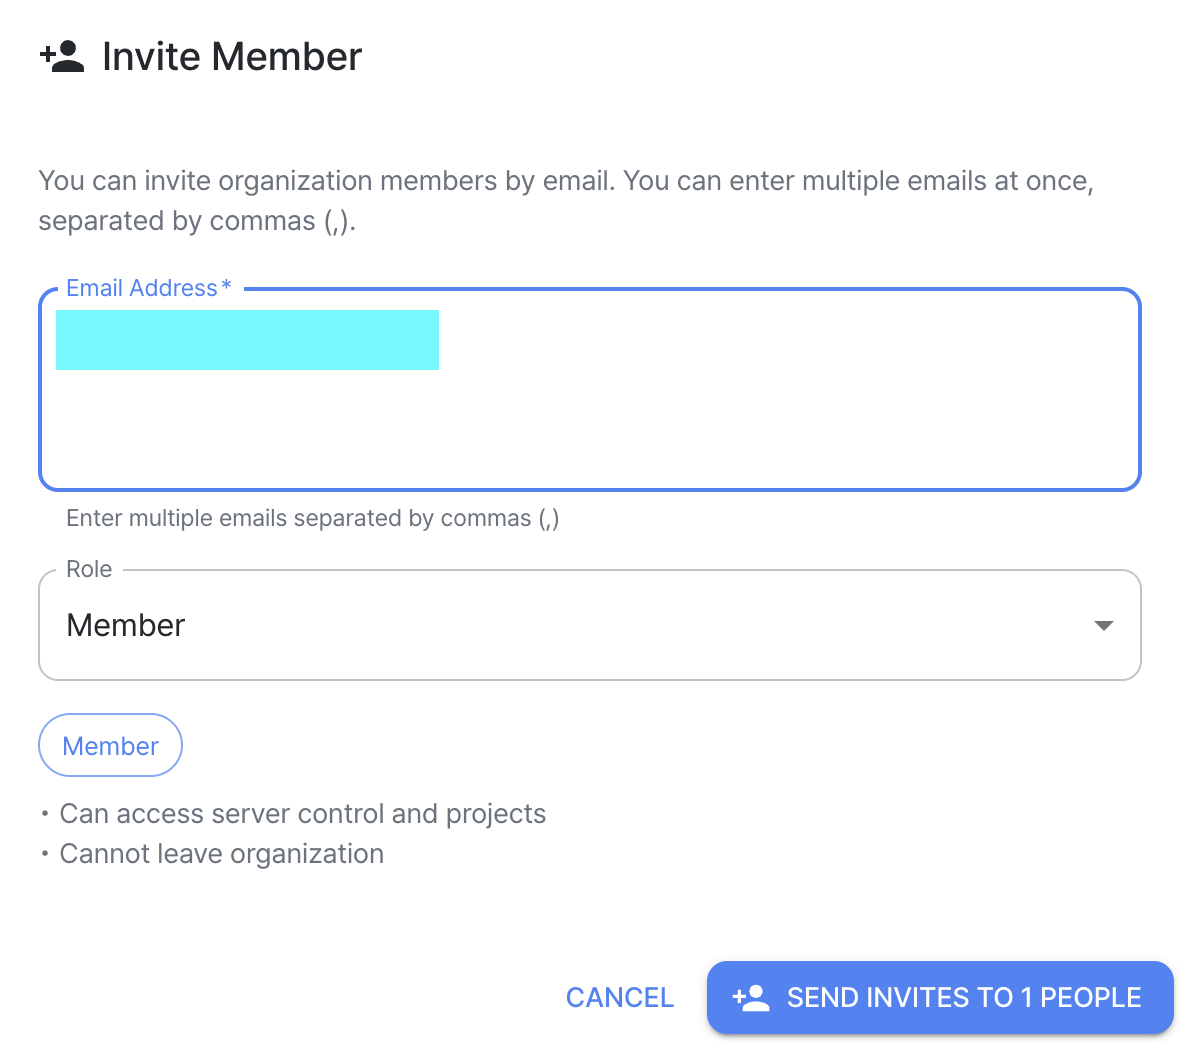
3. Invite Users
- Click the
Invite Memberbutton to invite new users to the organization via email. - When inviting, you can set permissions as Administrator or Member.

4. Permissions and Restrictions
- Administrator: Can export users with member permissions.
- Member: Cannot leave the organization on their own.
5. Access Permissions
- Users belonging to the same organization can select the organization to access server control and project access for that organization.
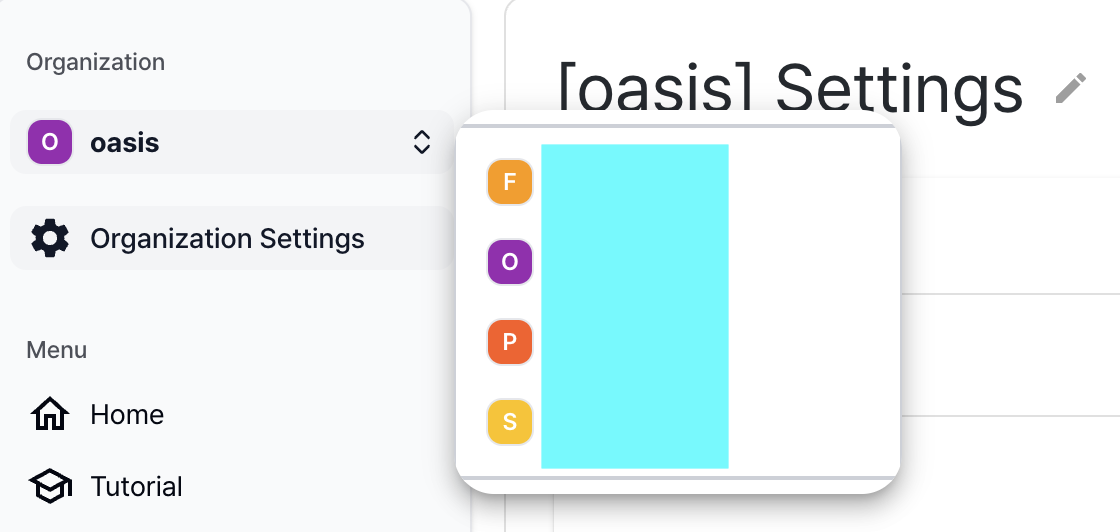
Note
-
When user A is invited to user B's organization → A can access all of B's projects.
-
However, B cannot access A's organization projects → B must be invited to A's organization.
-
When belonging to multiple organizations, the project's organization is determined by which organization is selected in the studio when creating a project.
- Example: If A belongs to B's organization and creates a project while B organization is selected in the studio
→ That project belongs to B organization.
- Example: If A belongs to B's organization and creates a project while B organization is selected in the studio