재질 (Material)
3D 모델의 모든 표면은 재질을 사용하여 렌더링됩니다. 재질은 색상, 광택, 거칠기 등 해당 표면의 속성을 정의합니다.
OasisW에서 재질은 이러한 모든 속성을 함께 수집하는 에셋 유형입니다. 기본적으로 Physical 재질을 나타냅니다. 이는 부드러운 플라스틱부터 거친 나무, 또는 긁힌 금속까지 다양한 시각 효과를 만들기 위해 사용할 수 있는 기본 속성을 노출합니다.
기존 Phong 재질 유형도 지원합니다.
재질 가져오기
3D 모델(예: FBX) 파일을 OasisW에 업로드할 때 재질이 자동으로 가져옵니다. 재질은 3D 모델링 도구에 존재하는 것과 동일한 속성으로 생성됩니다. 임베디드 미디어(FBX만 해당)를 사용하여 업로드하면 모든 관련 텍스처 맵이 자동으로 설정됩니다.
새 재질 생성
OasisW 에디터 인터페이스에서 직접 새 재질을 만들 수 있습니다.
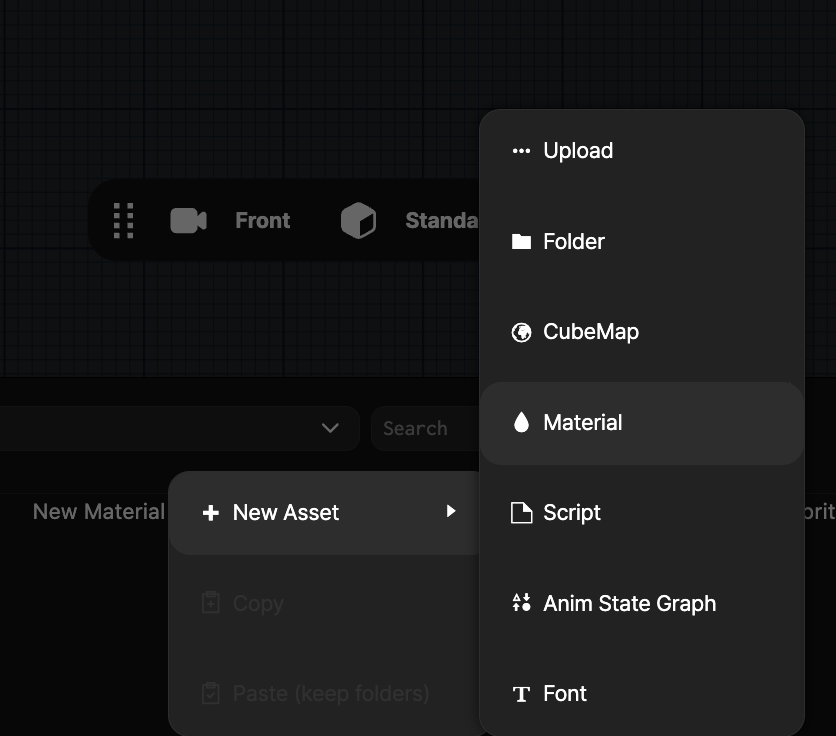
이렇게 하면 새 재질 에셋이 생성되고 화면 오른쪽에 재질 검사기가 열립니다.
재질 선택

재질을 편집하려면 먼저 선택해야 합니다. 이렇게 하면 재질 검사기가 나타납니다.
에셋 패널에서 재질을 선택할 수 있습니다. 모델 검사기나 모델 컴포넌트에서도 재질을 선택할 수 있습니다.
일반적으로 재질 미리보기 아이콘을 클릭하면 재질 검사기로 이동합니다.
재질 할당
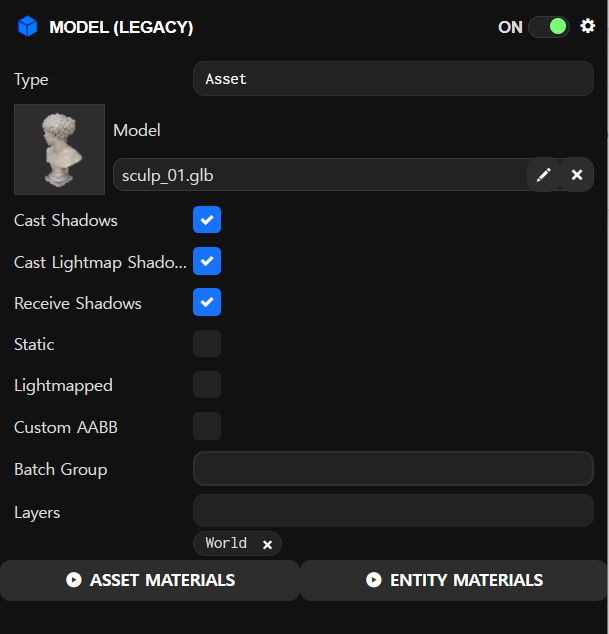
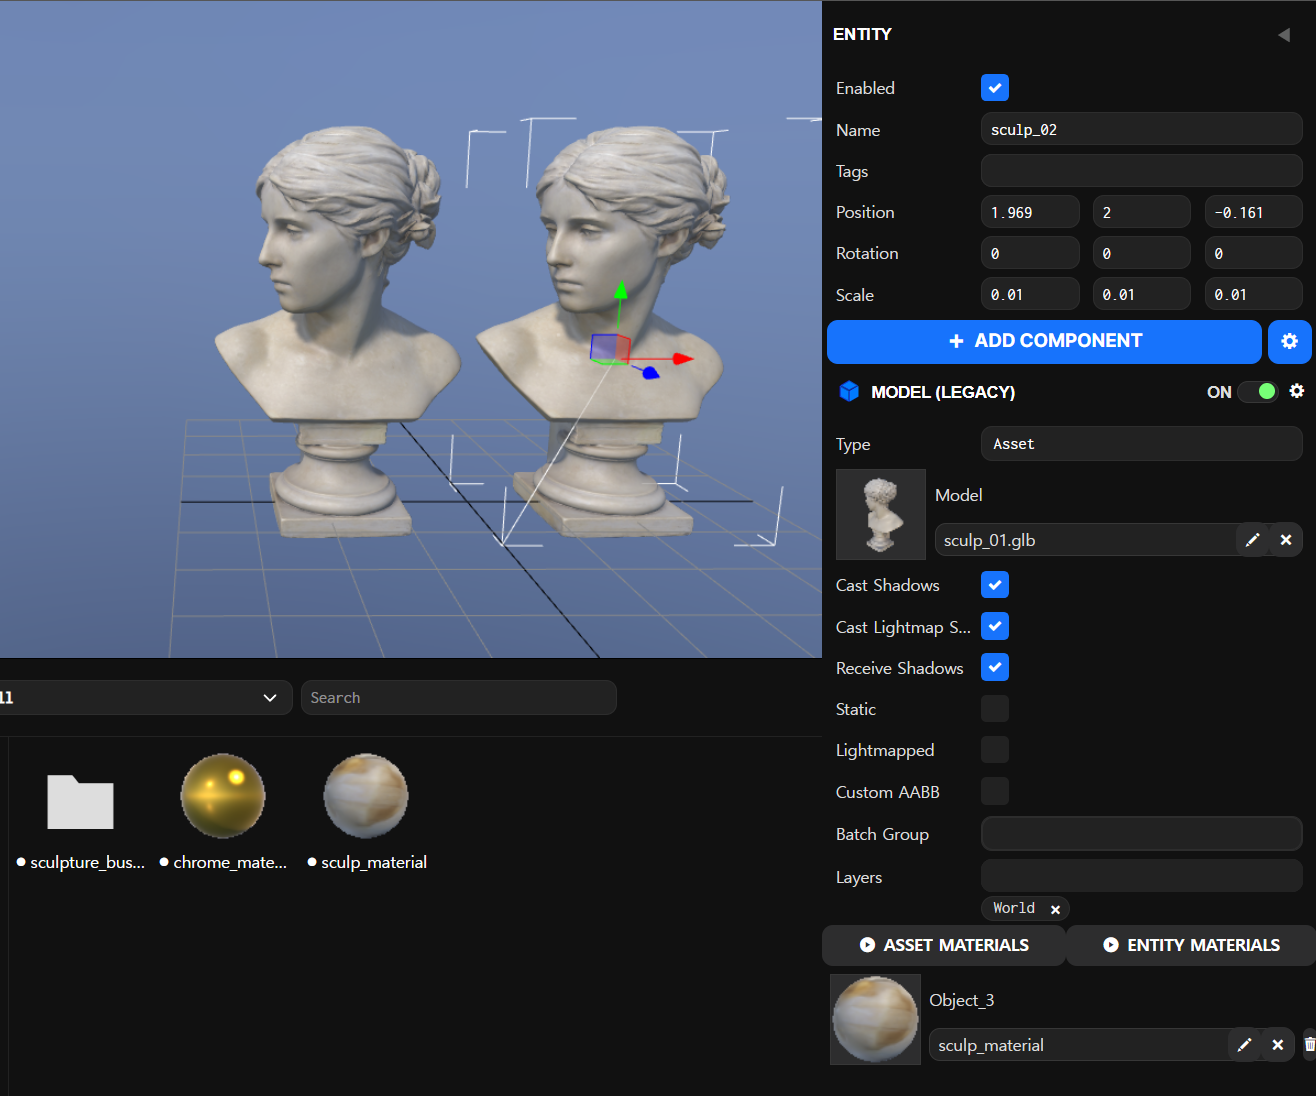
모델 에셋에서 어디에 어떤 재질이 할당되는지 수정하거나, 모델 컴포넌트가 있는 특정 엔티티의 재질을 사용자 정의할 수 있습니다.
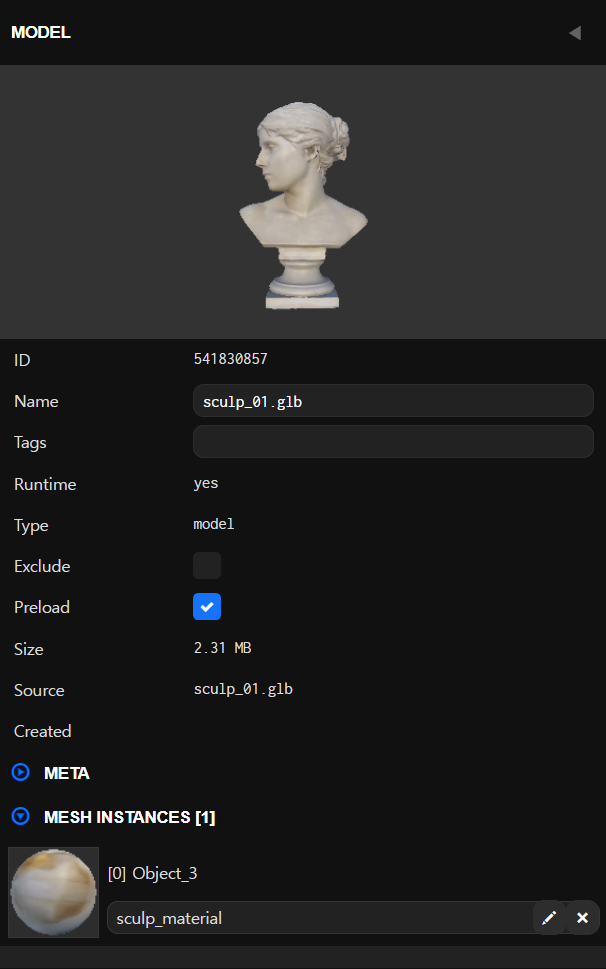
에셋 재질을 클릭하면 모델 에셋이 선택됩니다. 에셋 패널에서도 모델 에셋을 선택할 수 있습니다. 모델 검사기는 모델의 메시와 각각에 할당된 재질을 보여줍니다. X 버튼을 사용하여 재질을 지우고 빈 슬롯을 클릭하여 새 재질을 할당할 수 있습니다.
에셋 패널에서 재질 에셋을 재질 슬롯으로 드래그 앤 드롭할 수도 있습니다.
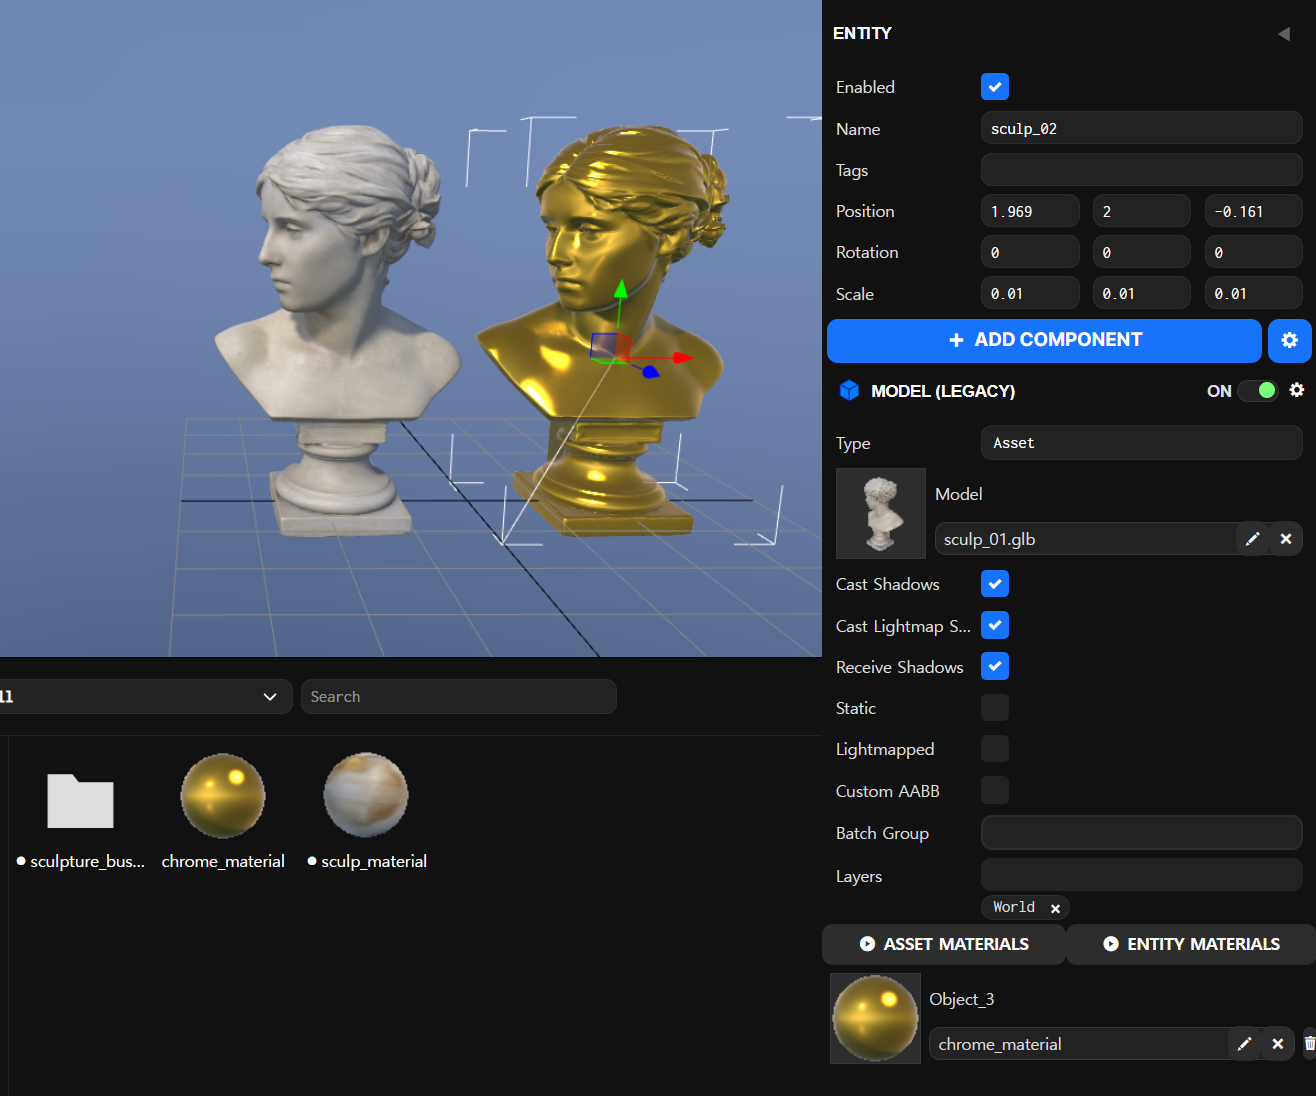
엔티티 재질을 클릭하면 먼저 재질을 사용자 정의할 메시 인스턴스를 선택하라고 요청합니다:
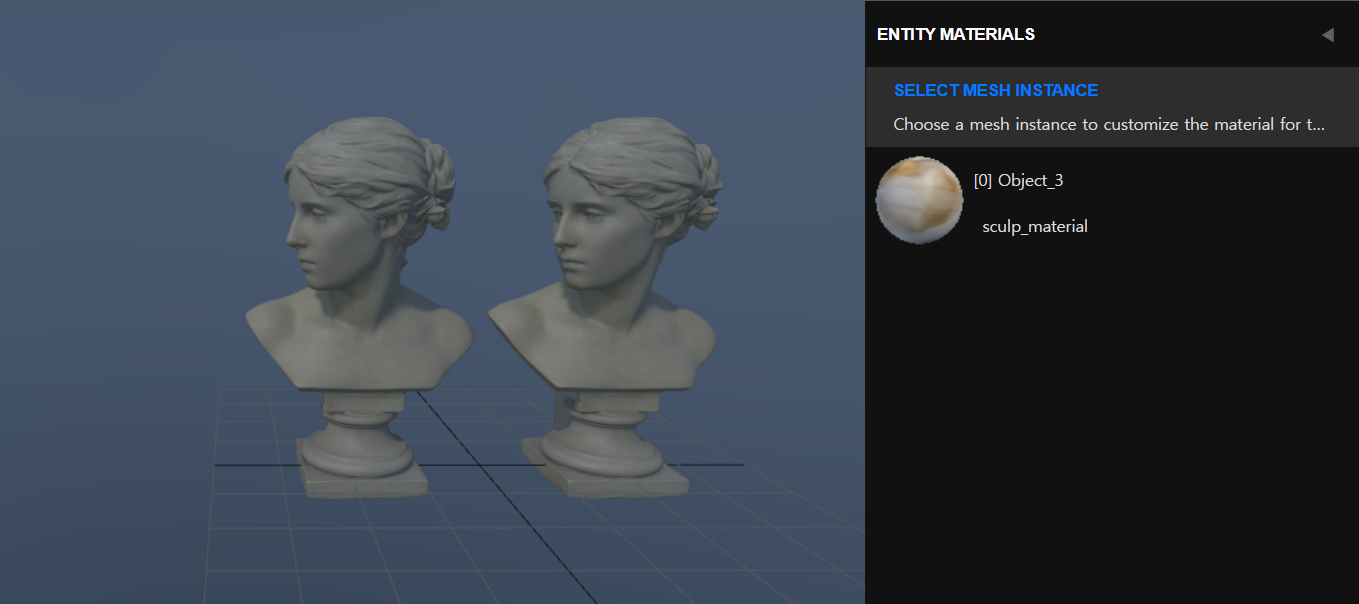
메시 인스턴스를 선택한 후 모델 컴포넌트에 새 재질 선택기가 나타납니다:
그런 다음 이 특정 엔티티에 대해 다른 재질을 선택할 수 있습니다:
재질 편집
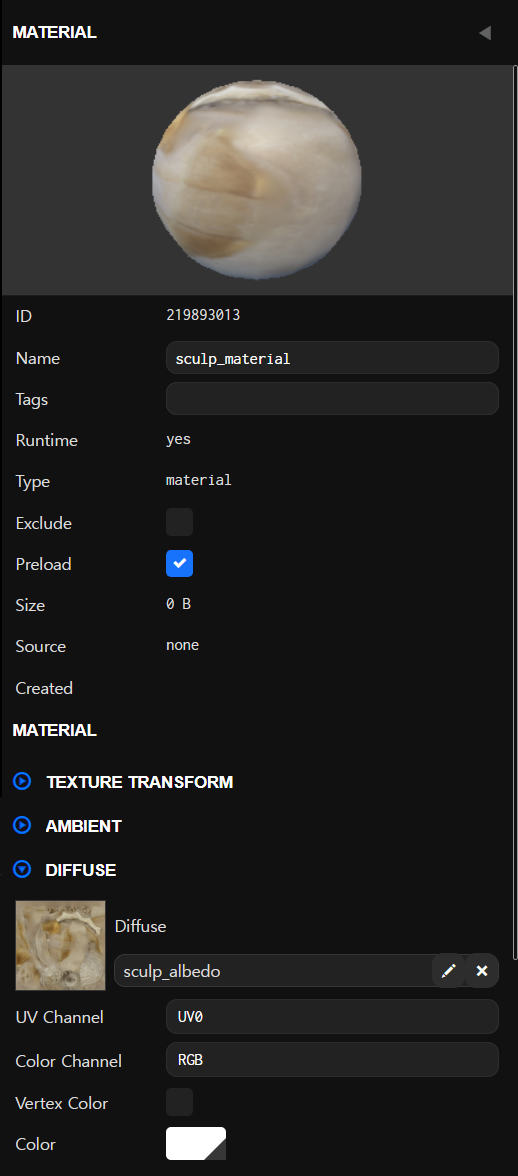
재질을 선택하면 속성을 편집할 수 있습니다.
재질 맵
재질 편집의 대부분은 위 페이지에서 자세히 설명된 다양한 슬롯에 텍스처 맵을 생성하고 할당하는 것입니다.
재질의 대부분의 텍스처 맵 슬롯에서 사용할 수 있는 몇 가지 옵션이 있습니다.
텍스처 에셋
첫 번째는 텍스처 에셋으로, 이미지를 OasisW에 업로드하면 텍스처 에셋을 생성해드립니다. 이를 재질의 슬롯에 할당할 수 있습니다.
색상 또는 틴트 색상
일부 맵 슬롯은 텍스처 맵 대신 단색일 수 있습니다. 일부 슬롯은 텍스처가 할당된 경우 틴트 색상도 지원합니다. 활성화되면 틴트 색상이 텍스처 맵 슬롯의 색상과 곱해집니다.
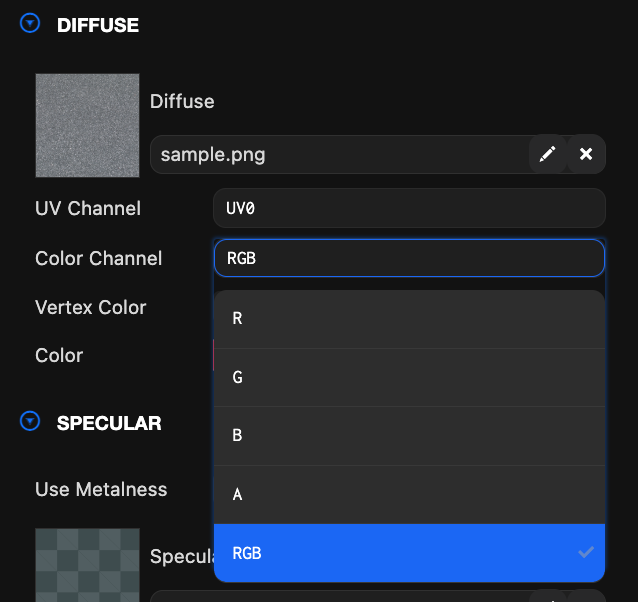
채널
일부 맵은 0.0 -> 1.0과 같은 단일 그레이스케일 값만 필요합니다. 이 경우 사용할 텍스처의 채널을 선택할 수 있습니다. RGB는 세 채널이 모두 사용됨을 의미합니다. R, G 또는 B는 빨간색, 녹색 또는 파란색 채널만 사용됨을 의미합니다.
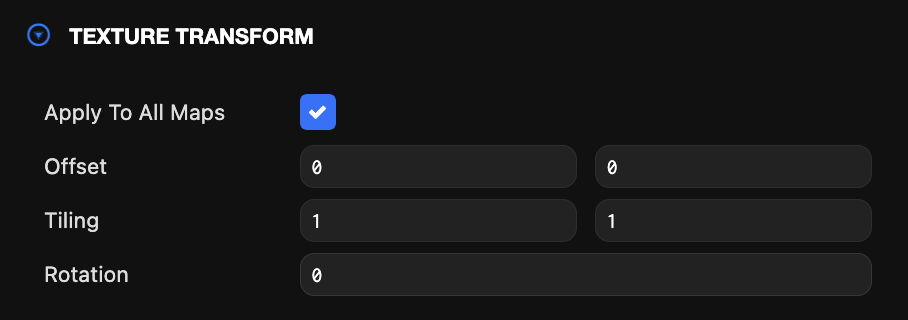
텍스처 변환
| 속성 | 설명 |
|---|---|
| Apply to all Maps | 개별 맵에 오프셋과 타일링 값을 적용하려면 이 옵션을 해제하세요. |
| Offset | 이 재질의 맵에서 참조하는 첫 번째 UV 채널에 적용할 U와 V의 오프셋입니다. |
| Tiling | 이 재질의 맵에서 참조하는 첫 번째 UV 채널에 적용할 U와 V의 스케일입니다. |
| Rotation | 이 재질의 맵에서 참조하는 첫 번째 UV 채널에 적용할 U와 V의 회전입니다. |
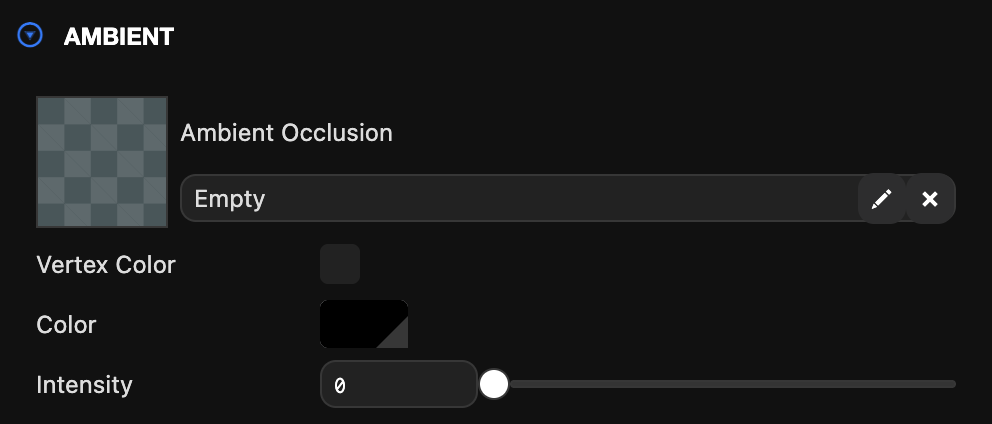
앰비언트
앰비언트 속성은 재질이 앰비언트 조명에서 어떻게 나타나는지를 결정합니다.
| 속성 | 설명 |
|---|---|
| AO Texture | 사전 베이킹된 앰비언트 오클루전을 포함하는 앰비언트 오클루전 맵입니다. |
| Vertex Color | AO에 메시 버텍스 색상을 사용합니다. aoMap이 설정된 경우 버텍스 색상과 곱해집니다. |
| Color | 씬의 전역 앰비언트 색상과 곱할 틴트 색상입니다. |
| Intensity | 앰비언트 오클루전 강도입니다. 기본값은 1입니다. |
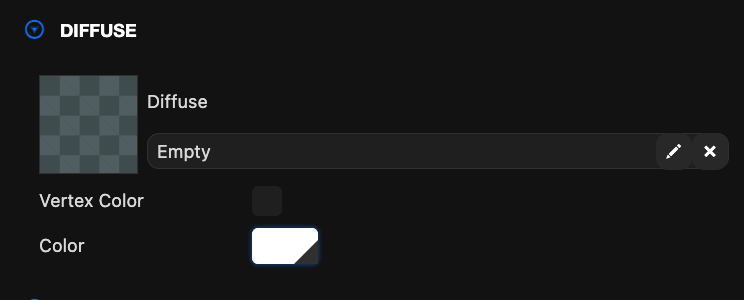
디퓨즈
디퓨즈 속성은 재질이 씬의 동적 조명 소스에서 방출되는 디퓨즈 조명을 어떻게 반사하는지를 정의합니다.
| 속성 | 설명 |
|---|---|
| Texture | 픽셀당 디퓨즈 재질 색상을 지정하는 디퓨즈 맵입니다. 디퓨즈 맵이 설정되지 않은 경우 대신 디퓨즈 색상이 사용됩니다. |
| Vertex Color | 메시 버텍스 색상으로 디퓨즈를 곱합니다. |
| Color | 디퓨즈 맵이 설정되지 않은 경우 이것이 재질의 디퓨즈 색상입니다. 디퓨즈 맵이 설정되고 틴트가 활성화된 경우 이 색상이 재질의 디퓨즈 맵을 변조합니다. |
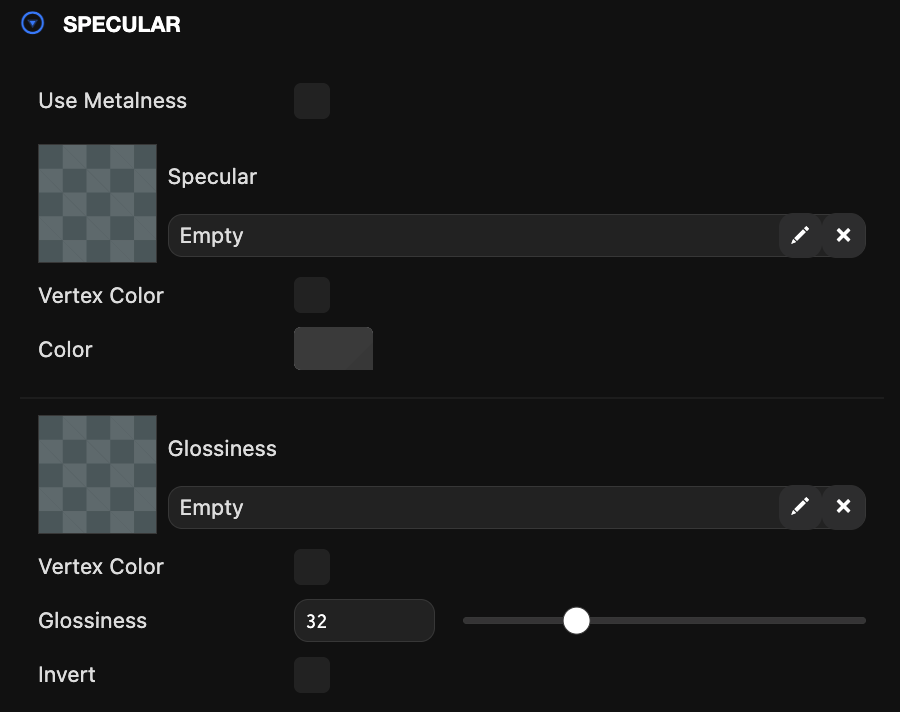
스펙큘러
스펙큘러 속성은 스펙큘러 하이라이트의 색상을 정의합니다. 즉, 광택입니다.
| 속성 | 설명 |
|---|---|
| Use Metalness | 스펙큘러와 메탈니스 워크플로우 간 전환합니다. |
| Specular Map | 픽셀당 스펙큘러 색상을 지정하는 스펙큘러 맵입니다. 스펙큘러 맵이 설정되지 않은 경우 대신 스펙큘러 색상이 사용됩니다. |
| Vertex Color | 스펙큘러에 메시 버텍스 색상을 사용합니다. specularMap 또는 specularTint가 설정된 경우 버텍스 색상과 곱해집니다. |
| Color | 스펙큘러 맵이 설정되지 않은 경우 이것이 재질의 스펙큘러 색상입니다. 스펙큘러 맵이 설정되고 틴트가 활성화된 경우 이 색상이 재질의 스펙큘러 맵을 변조합니다. |
| Metalness Map | [메탈니스 사용 시에만] 이 맵은 픽셀당 메탈니스 값을 지정합니다. 값 1은 금속이고 값 0은 비금속입니다. |
| Vertex Color | 메탈니스에 메시 버텍스 색상을 사용합니다. metalnessMap이 설정된 경우 버텍스 색상과 곱해집니다. |
| Metalness | 표면이 얼마나 금속적인지를 정의합니다. 0(유전체)에서 1(금속)까지입니다. |
| Metalness Specular Color | 메탈니스가 활성화된 경우 스펙큘러 맵을 사용하여 스펙큘러 반사에 색상 틴트를 적용합니다. 직접 각도에서. |
| Gloss Map | 픽셀당 광택 값을 지정하는 글로스 맵입니다. 글로스 맵은 광택 속성에 의해 변조됩니다. |
| Glossiness | 표면의 부드러움을 결정하는 값입니다. 더 작은 광택 값의 경우 표면이 더 거칠고 스펙큘러 하이라이트가 더 넓어집니다. 더 큰 광택 값의 경우 표면이 더 부드럽고 더 집중된 스펙큘러 하이라이트를 보여줍니다(표면이 연마되고 반짝이는 것처럼). |
| Invert | 글로스 구성 요소를 반전합니다(기본값은 false). 이 플래그를 활성화하면 재질이 글로스 멤버를 거칠기로 처리합니다. |
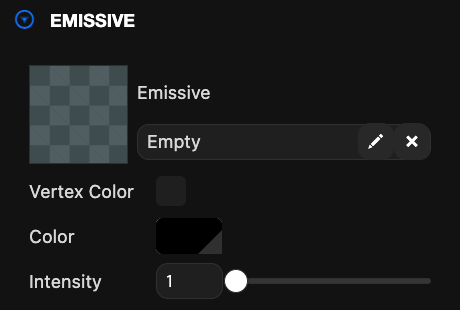
이미시브
이미시브 속성은 재질이 빛을 어떻게 방출하는지(반사하는 것과 반대)를 제어합니다.
| 속성 | 설명 |
|---|---|
| Texture | 픽셀당 이미시브 색상을 지정하는 이미시브 맵입니다. 이미시브 맵이 설정되지 않은 경우 대신 이미시브 색상이 사용됩니다. |
| Vertex Color | 이미시브에 메시 버텍스 색상을 사용합니다. emissiveMap 또는 emissive가 설정된 경우 버텍스 색상과 곱해집니다. |
| Color | 이미시브 맵이 설정되지 않은 경우 이것이 재질의 이미시브 색상입니다. 이미시브 맵이 설정되고 틴트가 활성화된 경우 이 색상이 재질의 이미시브 맵을 변조합니다. |
| Intensity | 예외적으로 밝은 이미시브 재질에 대해 과밝기 효과를 달성할 수 있는 이미시브 색상의 배수입니다. |
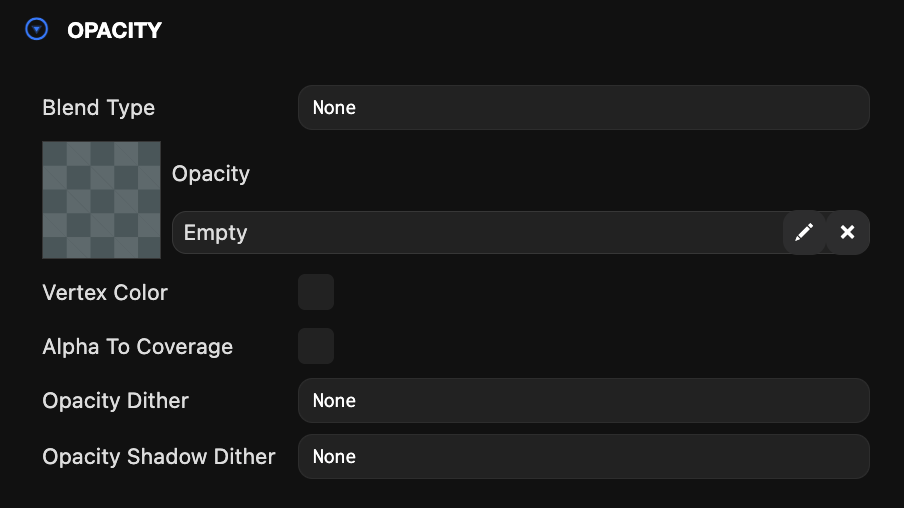
불투명도
불투명도는 투명도 수준을 설정합니다.
| 속성 | 설명 |
|---|---|
| Blend Type | 이 재질의 블렌드 모드를 가져옵니다. |
| Texture | 픽셀당 불투명도를 지정하는 불투명도 맵입니다. 불투명도 맵은 'Amount' 속성에 의해 변조됩니다. |
| Vertex Color | 불투명도에 메시 버텍스 색상을 사용합니다. opacityMap이 설정된 경우 버텍스 색상과 곱해집니다. |
| Alpha To Coverage | 알파 투 커버리지를 활성화하거나 비활성화합니다(WebGL2만 해당). |
| Opacity Dither | 불투명도가 디더링되는지 여부를 지정하는 데 사용되며, 알파 블렌딩 없이 투명도를 허용합니다. |
| Opacity Shadow Dither | 섀도우 불투명도가 디더링되는지 여부를 지정하는 데 사용되며, 알파 블렌딩 없이 섀도우 투명도를 허용합니다. |
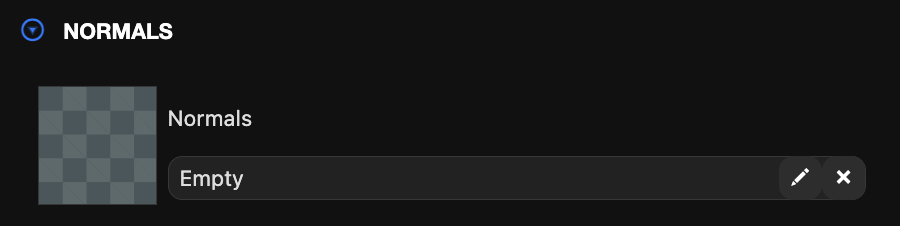
노멀
노멀 맵을 지정하는 데 사용합니다(이들은 거칠기를 결정합니다 - OasisW에서는 높이 맵이 아닌 노멀 맵을 사용해야 합니다).
| 속성 | 설명 |
|---|---|
| Texture | 픽셀당 표면 노멀을 지정하는 노멀 맵입니다. 노멀 맵은 'Bumpiness' 속성에 의해 변조됩니다. |
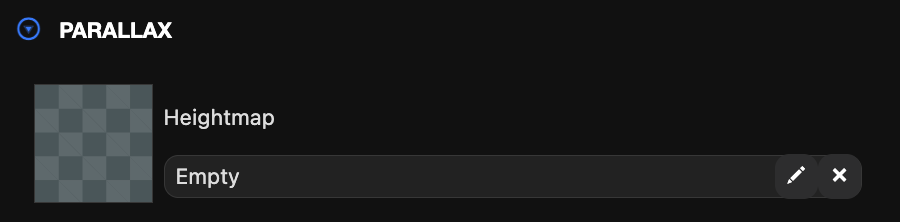
패럴랙스
패럴랙스 맵은 표면에 깊이의 착시를 주어 노멀 맵에 더욱 사실감을 제공합니다. 재질에 노멀 맵을 설정한 경우에만 패럴랙스 옵션이 활성화됩니다.
| 속성 | 설명 |
|---|---|
| Height Map | 패럴랙스 효과의 픽셀당 강도를 지정하는 높이 맵입니다. 흰색은 전체 높이이고 검은색은 제로 높이입니다. |
클리어코트
클리어코트는 표면 위에 얇은 투명한 코팅층을 시뮬레이션합니다. 자동차 페인트나 플라스틱 표면과 같은 현실적인 재질을 만들 때 사용됩니다.
| 속성 | 설명 |
|---|---|
| Clear Coat Factor | 0부터 1까지의 클리어코트 레이어 강도를 정의합니다. |
광휘
광휘는 직물이나 벨벳과 같은 섬유 재질에서 볼 수 있는 부드러운 반사 효과를 시뮬레이션합니다. 표면의 미세한 거칠기로 인해 생기는 산란된 반사를 표현합니다.

| 속성 | 설명 |
|---|---|
| Use Sheen | 광휘 스펙큘러 효과 사용을 활성화합니다. |
| Invert | 재질 광휘 광택을 반전시켜 효과적으로 거칠기로 처리합니다. |
굴절
굴절은 빛이 투명한 물질을 통과할 때 방향이 바뀌는 현상을 시뮬레이션합니다. 유리, 물, 크리스털과 같은 투명한 재질에서 볼 수 있는 빛의 굴절 효과를 표현합니다.

| 속성 | 설명 |
|---|---|
| Dynamic Refractions | 굴절을 위한 그랩 패스 사용을 활성화합니다. |
| Refraction Map | 굴절 맵은 픽셀당 굴절 양을 정의합니다. |
| Vertex Color | 굴절 강도에 버텍스 색상을 사용하거나 굴절 맵과의 배수로 사용합니다. |
| Refraction | 재질을 통과하는 빛의 부분을 결정하는 요소입니다. |
| Index Of Refraction | 재질을 통과하는 빛의 왜곡 정도를 결정합니다. 1.0 / 굴절률로 표현됩니다. |
| Dispersion | 볼륨을 통과하는 색상의 각도 분리(색수차) 강도입니다. 기본값은 0이며, 이는 분산이 없음을 의미합니다. |
무지개 빛
무지개 빛은 각도에 따라 색상이 변하는 현상을 시뮬레이션합니다. 비누방울, 기름띠, 나비 날개, 진주와 같은 재질에서 볼 수 있는 무지개색 반사 효과를 표현합니다.

| 속성 | 설명 |
|---|---|
| Use Iridescence | 무지개 빛 회절 효과를 활성화합니다. |
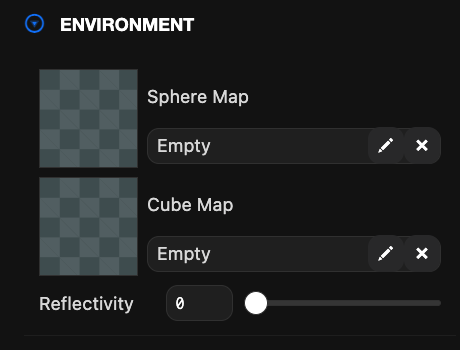
환경
환경 속성은 재질이 환경을 어떻게 반사하는지를 결정합니다.
| 속성 | 설명 |
|---|---|
| Sphere Map | 환경 반사를 근사하는 스피어 맵 텍스처 에셋입니다. 스피어 맵이 설정된 경우 큐브 맵 속성이 숨겨집니다(이 속성들이 상호 배타적이기 때문). |
| Cube Map | 환경 반사를 근사하는 큐브 맵 텍스처 에셋입니다(스피어 맵보다 더 높은 정확도). 큐브 맵이 설정된 경우 스피어 맵 속성이 숨겨집니다(이 속성들이 상호 배타적이기 때문). |
| Reflectivity | 재질에서 얼마나 많은 부분의 빛이 반사되는지를 결정하는 요소입니다. 이 값은 기본값이 1(완전 반사율)입니다. |
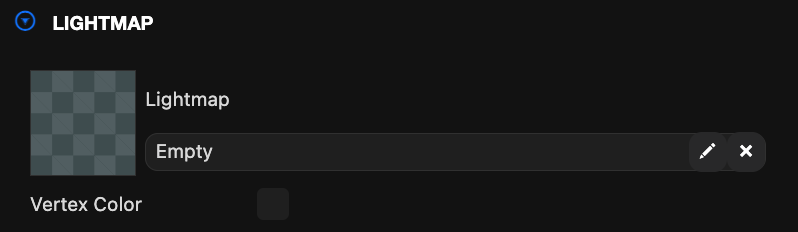
라이트 맵
라이트 맵은 사전 베이킹된 디퓨즈 조명을 포함합니다. 라이트 맵 사용은 런타임 동적 조명 계산을 사전 계산할 수 있다는 점에서 최적화로 간주됩니다.
| 속성 | 설명 |
|---|---|
| Texture | 사전 베이킹된 디퓨즈 조명을 포함하는 라이트맵 텍스처입니다. 라이트맵은 두 개의 UV 세트가 있는 메시에 재질을 적용해야 합니다. 라이트맵은 두 번째 UV 세트를 사용합니다. |
| Vertex Color | 베이킹된 버텍스 조명을 사용합니다. lightMap이 설정된 경우 버텍스 색상과 곱해집니다. |
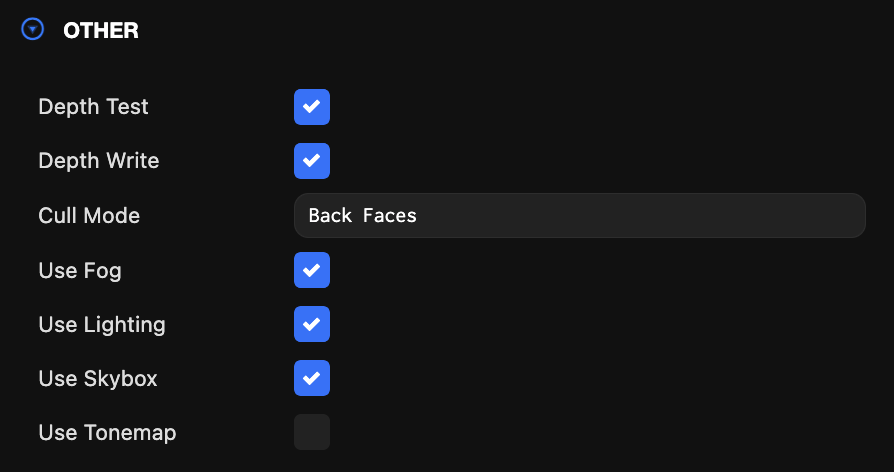
기타 렌더 상태
기타 렌더 상태는 지정된 재질로 메시가 어떻게 렌더링되는지에 대한 추가 제어를 제공합니다.
| 속성 | 설명 |
|---|---|
| Depth Test | 체크하면 재질이 있는 메시가 렌더링될 때 픽셀이 엔진의 깊이 테스트를 통과하는지 확인하기 위해 픽셀당 검사가 수행됩니다. 기본적으로 테스트는 픽셀이 깊이 버퍼에 이미 있는 것보다 작거나 같은 z 깊이를 가져야 한다는 것입니다. 즉, 앞에 아무것이 없을 때만 메시가 보입니다. 체크하지 않으면 깊이 버퍼에 이미 있는 것과 관계없이 메시가 렌더링됩니다. 기본값은 켜짐입니다. |
| Depth Write | 체크하면 재질이 있는 메시가 렌더링될 때 깊이 정보가 깊이 버퍼에 기록됩니다. 이렇게 하면 후속 메시가 렌더링될 때 이 재질로 렌더링된 메시에 대해 성공적으로 깊이 테스트할 수 있습니다. 기본값은 켜짐입니다. |
| Cull | 옵션은 다음과 같습니다:
|
| Use Fog | 안개를 적용합니다.(씬 설정에서 구성된 대로). |
| Use Lighting | 조명을 적용합니다. |
| Use Skybox | 사전 필터링된 환경 맵으로 씬 스카이박스를 적용합니다. |
| Use Tonemap | 톤매핑을 적용합니다(Scene#rendering 또는 CameraComponent.rendering에서 구성된 대로). 기본값은 true입니다. |